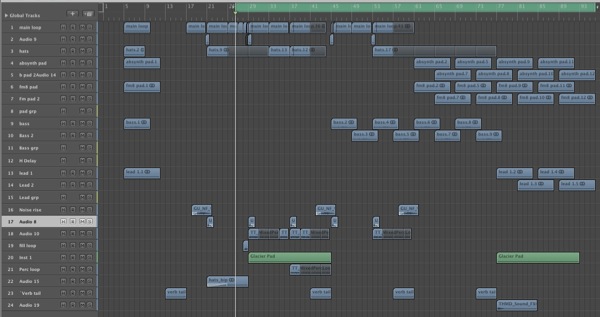
Step 1: Your Project
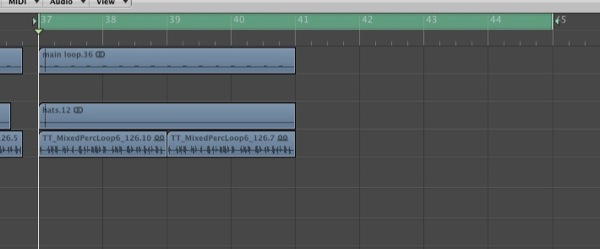
So here we have a simple project with a house feel. This may of been used in one of my previous tuts but it’s a great example of a project that needs some extra effects. Don’t worry if you work in a different genre this technique can be used regardless of style.As you can see things are a little sparse at this stage and some atmospheric effects would really flesh things out. Of course you could delve into your sample library at this point but I’ll try and show you an alternative approach that you can use.
Step 2: Adding Some Basic Reverb
The first thing to do is to choose a key part of your project to process. I opted for the drum group as it had the most dynamic impact. I then set up a send / return configuration and added a reverb plug-in. I have used Logic’s Space Designer here but any quality reverb plug-in will do.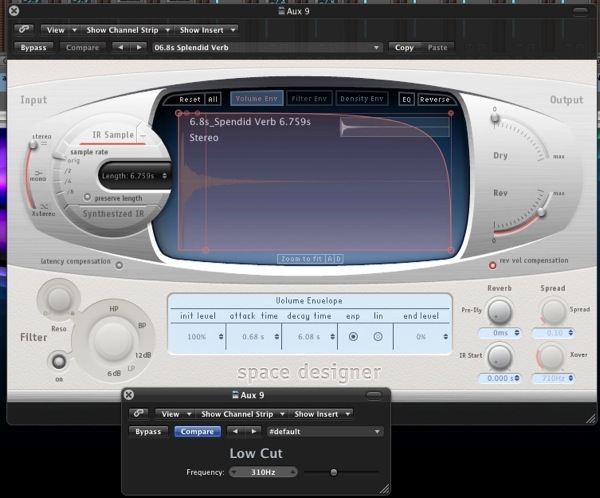 The Space designer used for the reverb effect.
I’ve gone for some thing pretty over the top here to make sure the effect I’m going for is clearly demonstrated but any patch with a decent decay time will get the job done. I’ve also used a simple low cut filter to ensure the reverb doesn’t contain any very low frequencies. This will keep things ‘clean’ and avoid the effect clashing with out low end mix.
 The send/return configuration used.
Step 3: Isolating the Effects
So we now have our drum loop heavily reverberated, the next step is to grab the effects signal in isolation. This will give us the raw material we need to work with. This part of the technique will differ slightly in every DAW but in Logic you can simply send the drum group to ‘no output’. This leaves the send and return set up intact while our dry signal is completely removed from the mix.You should now hear your reverb return completely ‘wet’ without any of the original dry drum loop. At this point we are ready to start exporting the results.
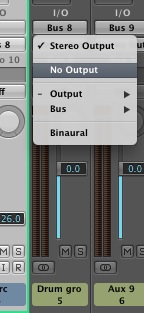 The dry channel is turned off.
Step 4: Exporting and Importing the Result
With our reverb isolated we can now export the results so we have a file that we can edit and manipulate. To do this simply select the area you want to capture using Logic’s locaters. (Most DAWs have a very similar system for capturing and bouncing audio).In this case I have selected a good section of the drums and also an area after the drums stop. This means I’ll capture the tail that plays out. It’s a good idea to set the end point of your export to a point well after the reverb effect finishes. This means you’ll definitely capture everything you need. You can always edit out any silence later.
 The required area is selected for export.
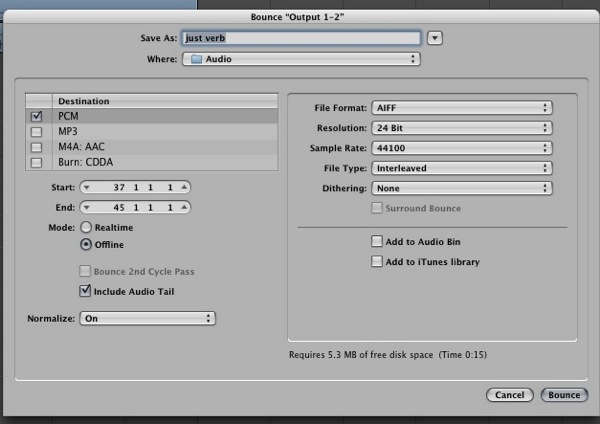 The export settings used.
 The reverb effect is imported into a fresh track Plug-ins used to treat the sound effect.
Step 5: Trimming and Mixing the New Audio
It’s a good idea at this point to trim the new imported audio. So if there is any silence at the start or end, get rid of it. This just makes any further editing easier and means that any reversed audio is perfectly in time.If your tail ends a little early and you can hear it cut off you can also add fades at this point to ensure a smooth finish.
Step 6: Reversing and Automating Your New Effect
Now we come to the bit that real makes this effect work. You can now remove the tail from the audio clip, in my case I grabbed the section after the drums had finished. This can be used in it’s original state as a crash effect or can be reversed to create a rising effect.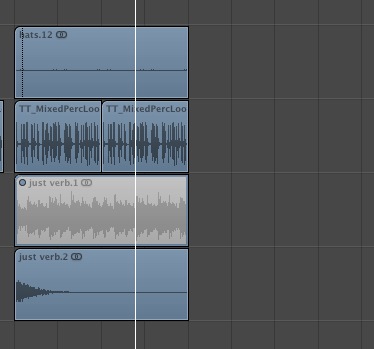 The trimmed tail is used as a simple crash effect.
… and then mixed with a real crash sample for impact.
For some extra spice and variation try automating some pan or filter effects to your new section of audio. You can also use the preceding section of reverb as a another effect or backdrop. Any part of the reverb export will work in your project because it originates from your original audio parts. You can comfortable in the fact that you can drop it anywhere in your track and it will blend organically.
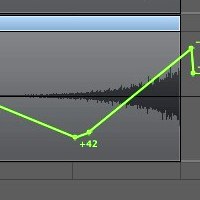
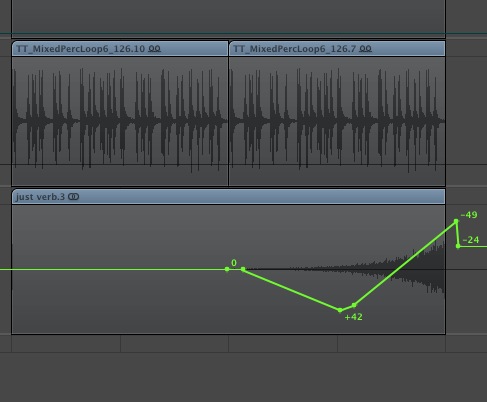 The effect is then reversed and some pan automation added.
You can also try the same technique with delay based effects tails and remember you can process the result in any way you like to create some much more complex and rich effects, so let your imagination run wild. Hopefully this will get you started and open a new area of effects processing for you.
No comments:
Post a Comment