Step 1
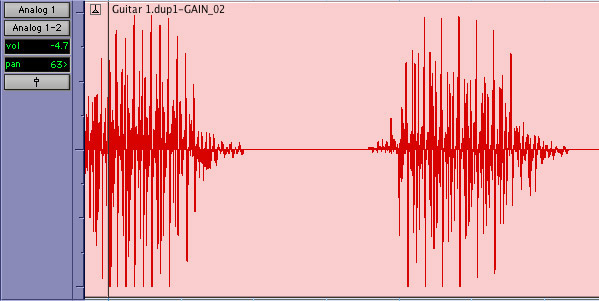
To become comfortable with the beat correcting process, it is best to a start off with a guitar track because it has many large transients and peaks within the waveform. If you cannot play guitar or do not have any guitar tracks available, bass and vocal tracks will also work fine. Drums are great too, assuming they are on multiple tracks.It will also help a good amount if your track has breaks or rests similar to the screenshot below. Start off creating a session as normal, and set up either a click track or a drum machine plug in. It is important to play along with this steady rhythm so that you will hear the effect of beat detecting during playback. Lastly, make sure that the “Tab to Transients” and “Keyboard Focus” buttons are checked. These two functions will be helpful throughout the process.

Step 2
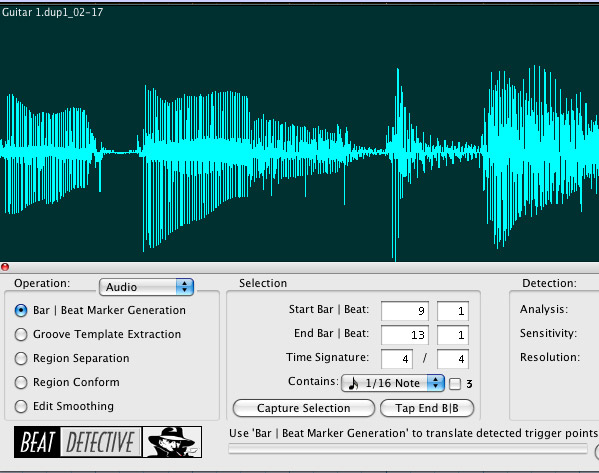
First, we will quantize using beat detective, which is a bit more complex than elastic time. Once you have an audio track ready to be quantized, make sure the timeline is set to “Grid” mode and use the hand or selection tool to pick a part of the region you want to beat detect.After you have the region selected, press the “E” key on your keyboard to get a zoomed in view of the waveform. You will need to closely watch the timeline marker and beat markers on the transients while beat detecting. Now go to “Event > Beat Detective” in the menu bar.
Step 3
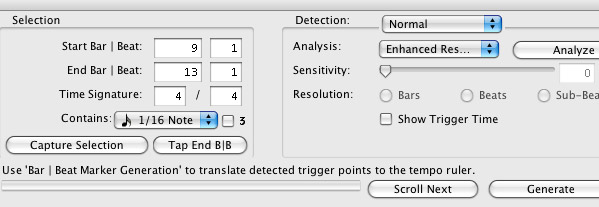
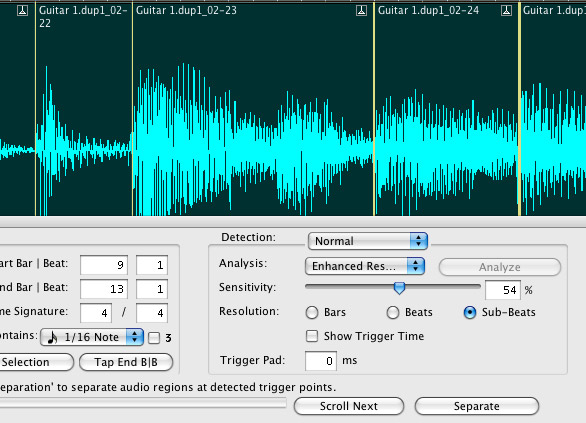
Now we have to create the beat markers so beat detective knows where audio should be on the grid. In the first section of beat detective, check to make sure that the start and end beat matches the area of the region you selected. If it does not you will have to click the “Capture Selection” button or type in the numbers manually.In the drop down list labeled “Contains,” select the quickest note value that occurs in the region you are quantizing. If there is even one note shorter than the “Contains” settings specify, the beat markers will not pick it up.
Step 4
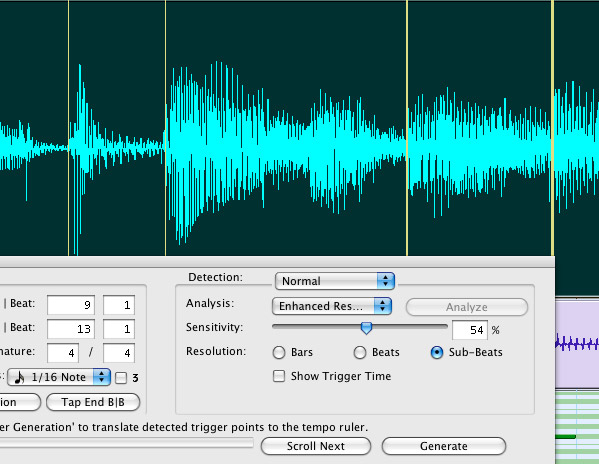
At the end of the window you will see two drop down menus. Depending on what version of Pro Tools you have (M Powered, LE, or HD) you may or may not see the first drop down labeled “Normal” in the screenshot below. The first menu should be left at “Normal” if it exists, and make sure the second menu has “Enhanced Resolution” selected.Now click “Analyze” and drag the sensitivity slider until you see beat markers placed against all of the notes in the waveform. Check that “Resolution” is set to Sub-Beats. If beat detective makes extra markers in the waveform these can be deleted. You can edit the beat markers by using the hand tool. Double clicking will create a new beat marker, and Option (Alt on a PC) clicking a beat marker will delete it. Also, by clicking and dragging you can move a beat marker, if you feel it is in the wrong place.
Getting the markers right is the most time consuming part of beat detective. Critical listening is required in order to make sure markers are in the right locations. It is sometimes helpful to play the track back at half speed to hear and to see when the timeline hits a spot in the waveform. Half speed playback can be accomplished by holding shift and pressing the spacebar.
Step 5
The next section on the left of the beat detective window called Groove Template Extraction is mainly for extracting a groove from an audio track and applying it to midi data. We do not need this for quantizing, so let’s skip to the section after that called Region Separation. All you need to do here is click the button labeled “Separate” at the bottom right hand corner.This will spilt the region into many parts based on where the beat markers exist. Now go to the next section called Region Conform. To hear the full effect of the quantization check off “Strength” and drag the slider to 100%. “Exclude Within” and “Swing” should be left unchecked, but these settings can be adjusted later in order to get the feel you want.
After this, click “Conform” in the bottom right and you should see the regions move slightly. If they move too far you may want to go back and check your beat markers.
Step 6
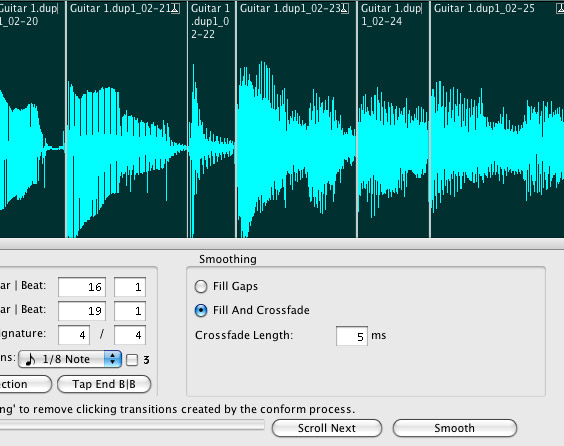
The audio track has now been quantized, but we aren’t done yet. We have to make sure that there are no region gaps (unwanted silent spaces), clicks, or pops in the audio. To prevent these things from happening, go to the last section called Edit Smoothing. In this section there are only two options, Fill Gaps or Fill and Crossfade.Fill and Crossfade yields the best results for clean audio so select that and leave the Crossfade Length at the default 5ms. After you have it selected, simply click the “Smooth” button at the bottom right. Now it’s time to listen to your fully quantized track!
If everything was done right, the track should have a very tight and possibly, ‘almost too perfect’ sound. Remember that if any part sounds off, just hit undo a few times to get back to before the regions were separated. Then you will be able to edit the beat markers again. Repeat these steps on as many tracks as you wish to correct. Use “Tab to Transients” to assist in selecting within a region, and remember to hit the E key to zoom in on your selection.
Once you go through this process a few times it becomes a very simple and relatively quick way of quantizing audio. Go on to Step 7 to learn a much easier way of quantizing!
Step 7
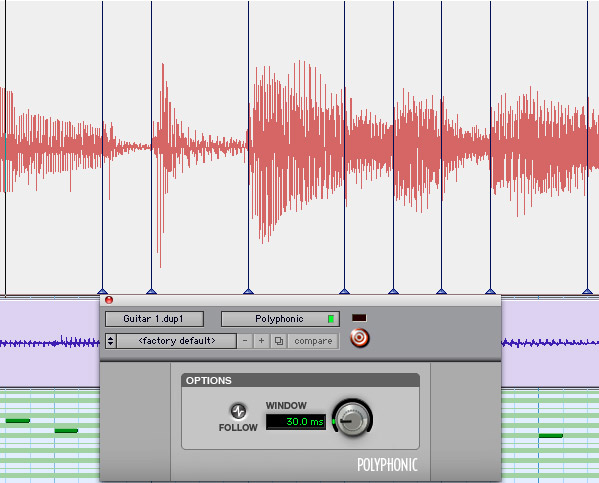
With Pro Tools version 7.4 it is possible to quantize tracks using elastic audio. Elastic audio will generate markers for you without any work. To enable elastic audio click the arrow button at the bottom of the track and select Polyphonic in the list (bottom arrow shown in screenshot). Wait a couple seconds for the warp markers to generate and then click the waveform button and switch it to warp view (top arrow in screenshot).
Step 8
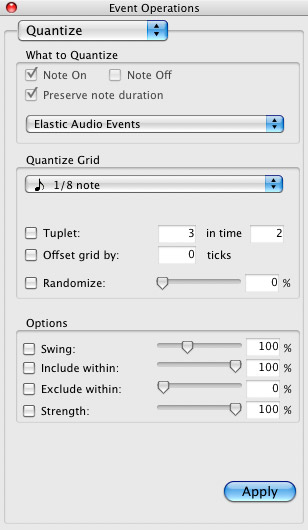
Here comes the cool part. Use the hand tool to select a region in the warped track and go to Event > Event Operations > Quantize. The window that you see below will appear. Set the quantize grid to the note value you need and leave all the other settings alone. Click apply and just like that your track has been quantized!Ironically elastic audio seems to have a better algorithm for automatically detecting beats. So why not use elastic audio all the time? Well, for one reason: having many warped tracks can eat up cpu cycles, though minimal in comparison to heavy plug-ins. Also, there are some tracks where elastic audio will not be accurate, and it becomes necessary to use beat detective in order to make sure tracks quantize the way you want.
More often than not though, elastic audio is a great way to quickly quantize your audio tracks.
Step 9
You have now fully quantized your track using elastic audio, but if something does not sound right you will need to know how to edit warp markers. Editing warp markers is very similar to editing beat markers in beat detective.Use the hand tool to click and drag a marker into a new position, and option (alt on a PC) click a marker to delete it. A marker can be unlocked by double clicking with the hand tool. A new marker can be created with a click from the pencil tool. Experiment with these different options to create the effect you are looking for. Now you have learned how to quantize audio using both beat detective and elastic audio. No more recording dozens of takes until you get it right. Have fun quantizing!
No comments:
Post a Comment